
Assign labels to your activities and packs

Assigning labels to your activities and packs will help you organize and subcategorize them. This article will walk you through the essentials of creating, assigning, and managing labels.
Why should I label my activities and packs?
Labeling allows customers to filter your offerings on your provider page. Pro tip: If you filter your provider’s public page by label, you can share a link to the pre-filtered list of activities with your customers via your website or social media.
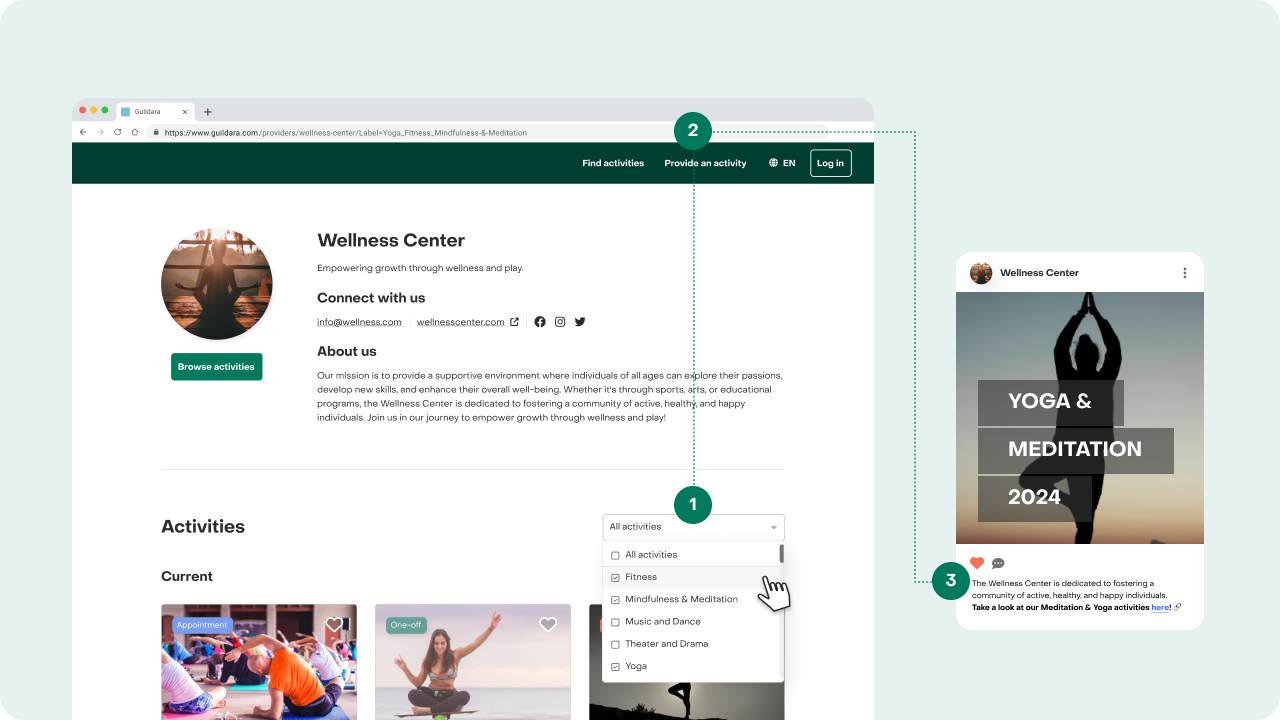
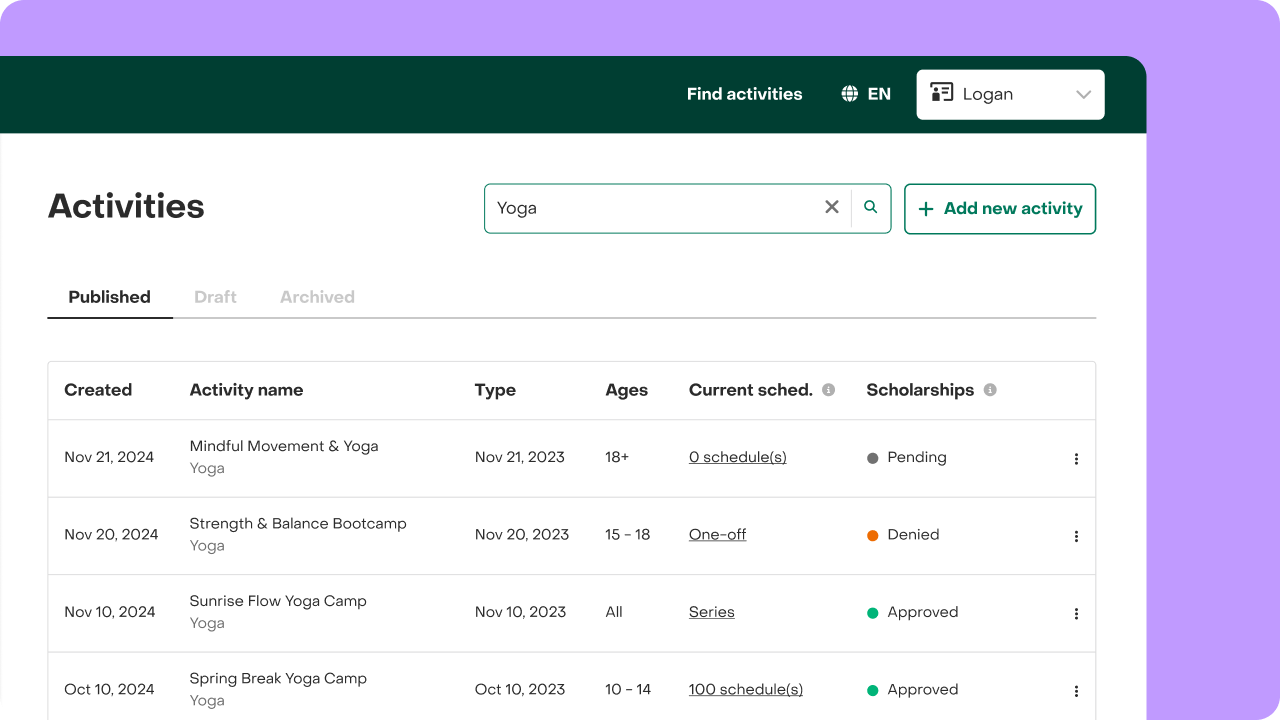
It will also help you filter the activities tab by searching for specific labels.
Labels also enable you to visualize your reports grouped by label.
Assign a label
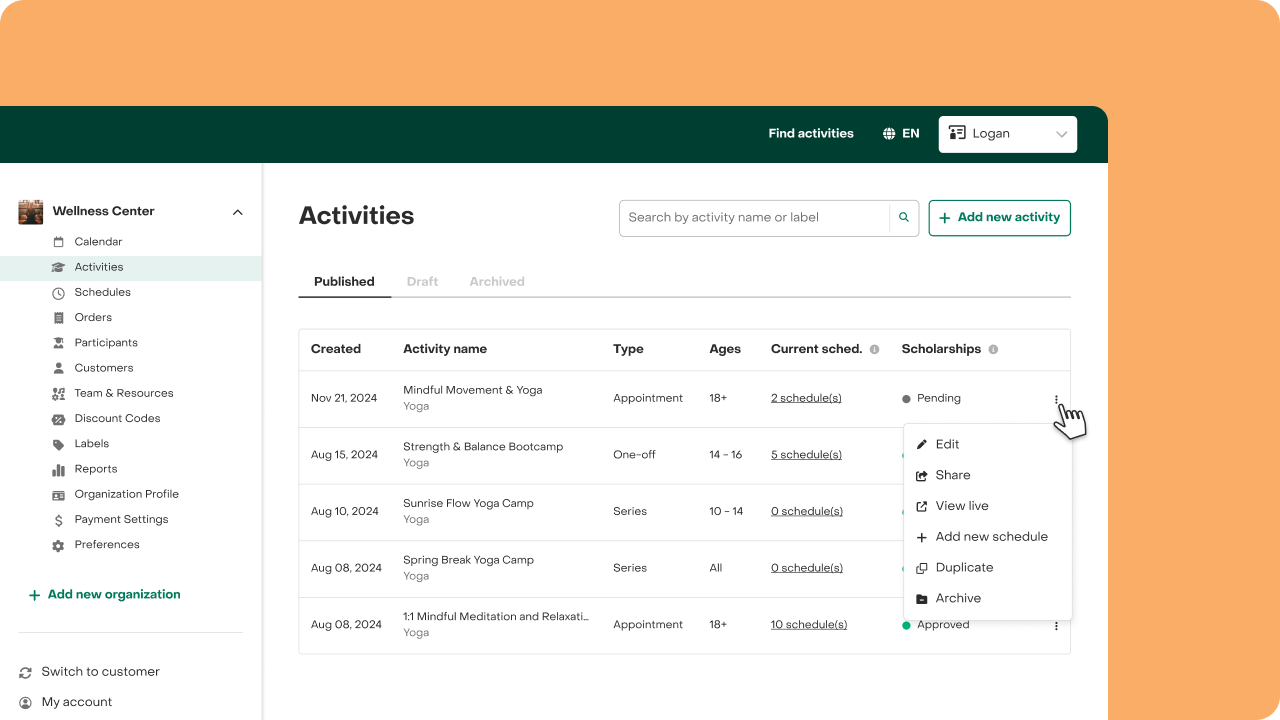
- Locate the item you want to assign a label to (either an activity or a pack).
- Click the “More Options” menu (⋮) on the row and click "Edit".
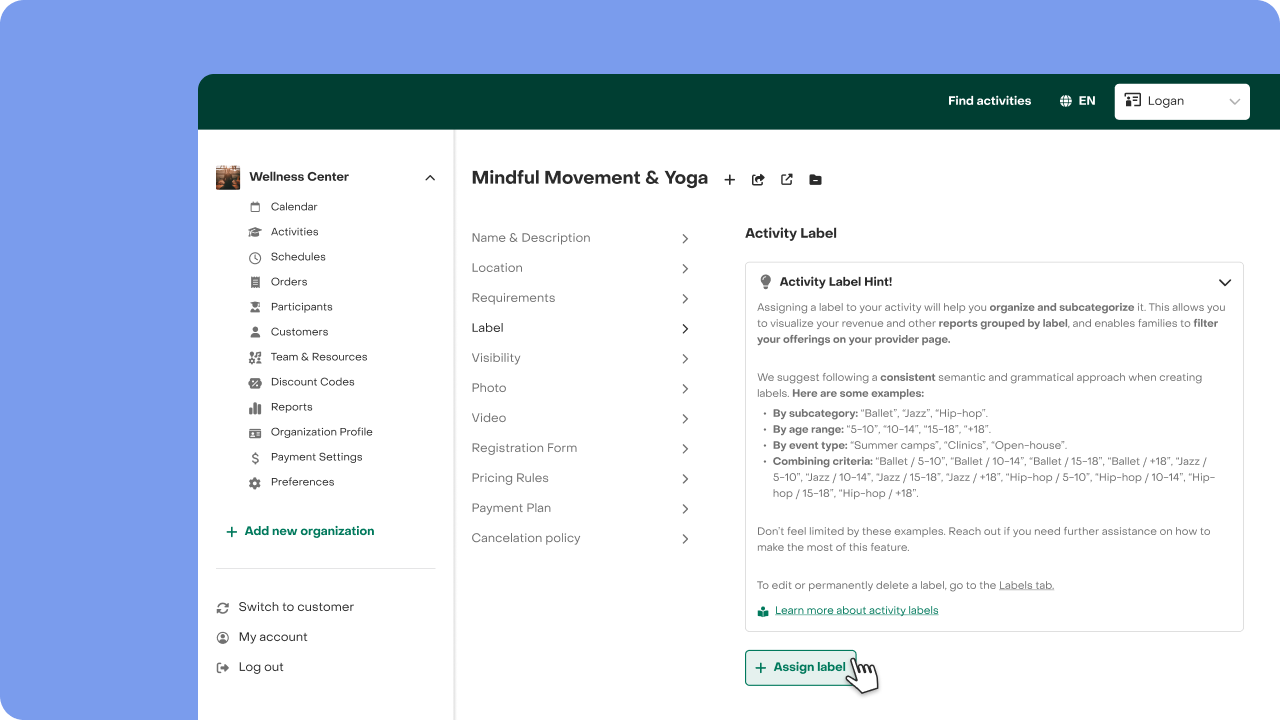
- Tap on the input and select the label you want to assign. You can only assign one label per item at the moment.
- Click "Save"!

Follow the same process if you want to change the assigned label or leave your item unlabeled again.
Create a label
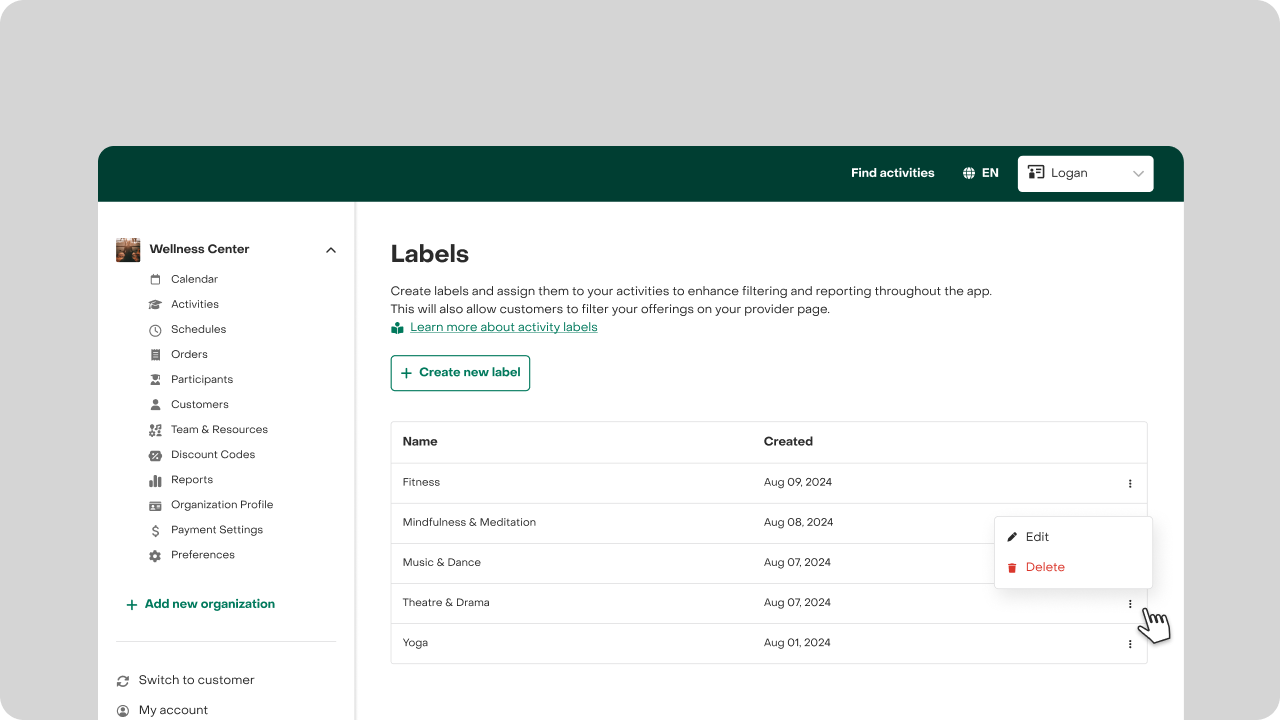
- Go to the "Labels" tab.
- Tap "Create new label".
- Assign a name to your label. The name must be unique—there can’t be two labels with the same name.
- Assign a color to your label. If you use labels to create packs, the preview card for the pack will also display the label color you assigned.
- Click "Create new label", and you're done!
We suggest following a consistent semantic and grammatical approach when creating labels. Remember that these labels will be visible to customers. Here are some examples:
- By subcategory: “Ballet,” “Jazz,” “Hip-hop.”
- By age range: “5-10,” “10-14,” “15-18,” “+18.”
- By event type: “Summer Camps,” “Clinics,” “Open House.”
- Combining criteria: “Ballet / 5-10,” “Ballet / 10-14,” “Ballet / 15-18,” “Ballet / +18,” “Jazz / 5-10,” “Jazz / 10-14,” “Jazz / 15-18,” “Jazz / +18,” “Hip-hop / 5-10,” “Hip-hop / 10-14,” “Hip-hop / 15-18,” “Hip-hop / +18.”
Don’t feel limited by these examples. Reach out if you need further assistance on how to make the most of this feature.
Manage your labels
Manage your labels easily through the Labels tab. Keep track of the labels you’ve created.
Edit label
- Go to the "Labels" tab.
- Look for the label you want to edit—labels are organized alphabetically.
- Tap on the three dots at the end of the label row and click "Edit".
- Make the desired changes, and remember to click "Save changes" once you're done.
Delete label
- Go to the "Labels" tab.
- Look for the label you want to delete—labels are organized alphabetically.
- Tap on the three dots at the end of the label row and click "Delete".
- Confirm the action to proceed.
Keep in mind this action can't be undone and has the following consequences:
- The label will be unassigned from all activities and packs where it is currently assigned.
- Neither you nor customers will be able to filter activities using this label.
- You won't be able to visualize reports grouped by this label anymore.
If you have feedback to share on this or any other feature, please reach out.

