
Pricing: set up a payment plan

A payment plan lets families pay the schedule cost in smaller installments instead of one full payment upfront. This can make enrollment more affordable and help more families join your programs. Follow these steps to set up a payment plan:
Step 1: Turn on the payment plan
When you’re creating a new schedule (or editing an existing one), scroll to the Price section, find the Payment Plan toggle and turn it ON. Once it’s on, you’ll see fields to customize your payment plan.
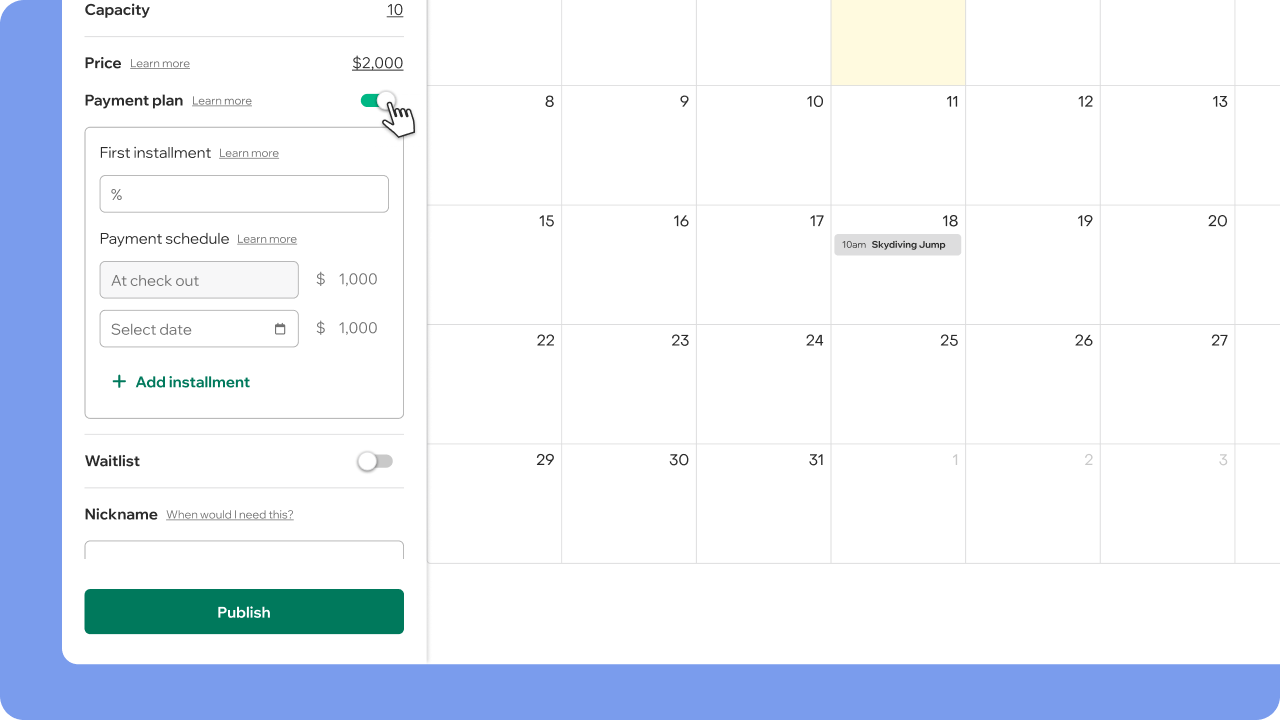
Step 2: Choose the 1st installment amount (optional)
You can choose how much the family pays at checkout:
- Higher amount upfront (collect more right away)
- Lower amount upfront
- Equal payments across all installments
To change it, enter a percentage in the First Installment field. If you leave it blank, all installments will be the same.
Let’s see some examples considering a $2,000 schedule:

Step 3: Choose the number of installments and due dates
Next, choose how many installments you’d like and when they should be charged. Click on “Add installment” to add up to 12 installments to your payment plan.
The amounts next to each installment will adjust automatically based on the schedule price and the first installment % you chose.
How this works for families
The actual amount each participant pays will also depend on:
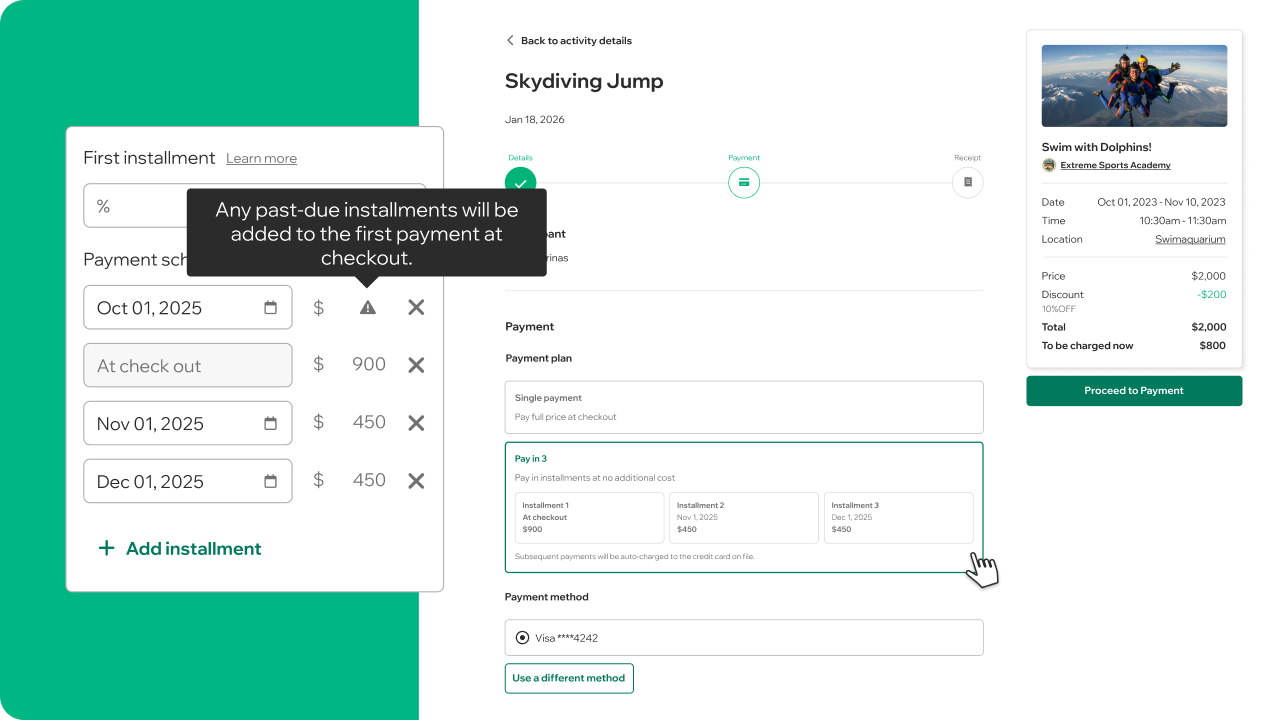
- Registration date: Families who register after some installments are already past due will pay those past installments at checkout.
- Price adjustments like scholarships, discounts, credits, packs, or add-ons will adjust the amounts automatically.
The payment plan will NOT appear at checkout if:
- All installment dates are in the past, or
- The remaining amount owed after adjustments is less than $1.
Step 4: Save or Publish
When you’re done:
- Click Save (if you were editing an existing schedule), or
- Click Publish (if it’s a new schedule)
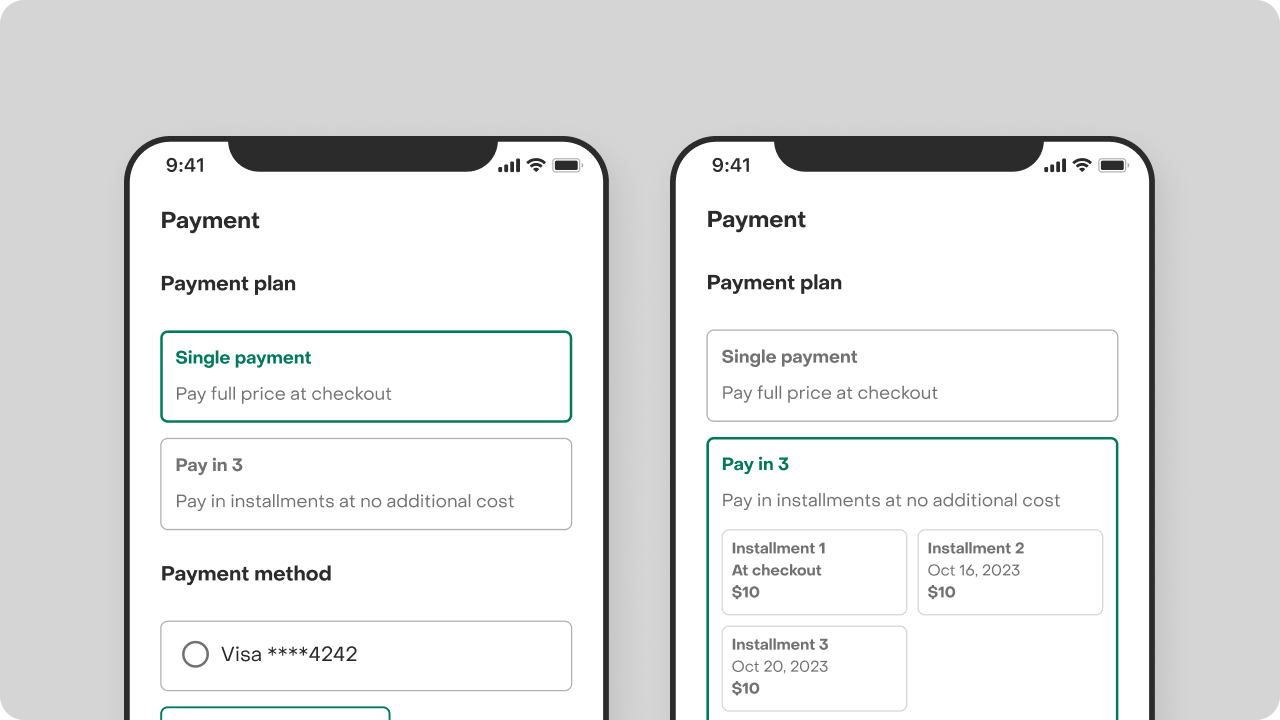
Families will now see the option to Pay in Full or Pay in Installments at checkout. You can edit your payment plan if needed, keeping in mind that changes will only impact future registrations.
How can I keep track of incoming payments?
Once a family enrolls in a payment plan, the system takes care of charging each installment automatically on its scheduled due date using the card the customer has on file.
If the payment goes through:
- The family will get an email receipt confirming the payment.
- You’ll see that installment marked as Paid in the order details.
If a payment fails:
- Both you and the family are notified via email. Customers will get proper instructions to update their payment method.
- The system will keep retrying the charge automatically
This means you don’t need to manually follow up right away. The platform does the first round of nudging for you.
You can view the status of each installment anytime by opening the Order Details page. In the Orders table, you can also filter by Pending or Late payments to see who needs follow-up.
Actions you may need
Here are related actions you may need:
- Add a payment method on behalf of a customer. For example, if they call or text you with updated card info.
- Collect a payment manually. If the customer wants to pay early, switch cards, or pay offline with cash or check.
- Refund payments or cancel upcoming installments.
How payment plans work with cancelation policies
That depends on the Cancelation Policy you have in place for the activity. Learn all you need to know about Cancelation Policy setup here.
If you wish to cancel a registration, regardless of the event start date, you can remove the participant from the schedule without any financial consequences. Financial matters, including refunds and installment cancellations, can be handled separately through the order page at your discretion.
If you have questions or want help setting up your first plan, we’re here for you. Reach out anytime!

